


For Birmingham families, preparing for busy school routines can start in the kitchen. A simple kitchen reset can make breakfast ingredients easier to find, lunch packing more organized, and everyday grocery needs easier to keep track of.
The goal is not a perfectly styled pantry or refrigerator. Instead, work through a practical sequence: clear out, check, clean, organize, set up, and restock. By taking inventory before shopping, you can see what your household already has and build a grocery list around what you actually need.
Step 1: Clear Out and Check What You Have
Start by taking inventory of the pantry, refrigerator, and freezer. Looking through each area is more reliable than trying to remember what is behind a box, tucked onto a refrigerator shelf, or stored at the back of the freezer.
Look for duplicates, frequently used foods that are running low, damaged packaging, and items you may have forgotten. As you review food, consider package dates along with package condition, storage history, and signs of spoilage.
A printed date does not automatically mean a food has become unsafe. Common labels such as “Best if Used By,” “Sell By,” and “Use By” do not all serve as universal food-safety expiration dates. According to USDA guidance, except for infant formula, food date labels generally are not indicators of food safety. Infant formula should not be used after its “Use-By” date.
Condition matters as well as dates. Significantly damaged, swollen, leaking, or badly rusted cans require appropriate handling rather than being evaluated only by the printed date.
Most importantly, start a restock-as-you-go list now. Whenever you find something genuinely missing, running low, or unusable, add it to the list immediately. That way, you will not have to reconstruct your grocery needs from memory at the end.
Use a Keep, Use Soon, or Replace/Discard Framework
Three simple categories can make the process more manageable:
- Keep: Usable foods and supplies your household expects to use.
- Use Soon: Appropriate foods you want to prioritize because of quality, storage history, or household planning.
- Replace or Discard as Appropriate: Items that should not remain based on spoilage, condition, applicable storage guidance, or household need.
This approach avoids treating every past-date food as automatically unsafe. For questions about a particular food, USDA Food Product Dating guidance and FoodSafety.gov FoodKeeper can provide more specific information.
Step 2: Clean and Reset the Pantry
Once you know what is staying, remove pantry items as needed so you can clean the shelves appropriately. Then return usable foods in an arrangement that supports your household’s normal routine.
You might create simple areas for Breakfast, Lunch/Snacks, and Dinner Basics. These zones are organizational tools rather than food-safety requirements, so there is no need to force your pantry into a particular layout.
Where practical, place older usable products toward the front and newer purchases behind them. Keeping frequently used foods visible and easy to reach can also reduce the time spent searching during busy mornings.
Effective pantry organization does not require matching bins, decorative labels, or rows of identical containers. Original packaging is appropriate, and transferring foods into decorative containers should not be treated as a way to make food inherently safer or automatically extend its shelf life.
Once you have identified what is actually missing, School-Year Pantry Essentials can provide more ideas about shelf-stable foods to consider replenishing without turning your kitchen reset into an oversized shopping project.
Step 3: Organize the Refrigerator and Freezer
Next, turn your attention to cold storage. Review refrigerator contents and remove foods that should no longer be kept based on spoilage, condition, storage history, and applicable food-safety guidance rather than relying on dates alone.
Clean spills and surfaces as needed. When foods go back into the refrigerator, group frequently used items logically so they are easier to find. Avoid overcrowding the refrigerator because cold air needs room to circulate.
Raw meat, poultry, and seafood should be securely contained so their juices cannot contaminate other foods, particularly ready-to-eat foods.
Detailed fruit and vegetable storage can vary by food, so keep this part of the reset focused on general organization. For more help, see keep fresh produce fresh during the school week.
Review the freezer while you are working in this area. Identify forgotten foods and organize existing items so you can see what is available before buying more.
An older freezer date does not automatically mean food is unsafe. Food continuously stored at 0°F can remain safe indefinitely, although its quality can decline over time. For questions about specific foods and recommended storage times, FoodSafety.gov FoodKeeper provides food-specific guidance.
Add a Quick Temperature Check
Take a moment to verify two important temperatures:
- Refrigerator: 40°F or below
- Freezer: 0°F
An appliance thermometer can help you verify the actual temperature instead of relying only on the appliance’s temperature control setting.
Step 4: Check Lunch-Packing and Food-Storage Supplies
Food is only part of getting the kitchen ready for school routines. Take a few minutes to gather the reusable supplies your household relies on for packed lunches and food storage.
Match containers with their lids. Check reusable bottles, insulated lunch bags or boxes, and cold packs for cleanliness and condition. Clean reusable lunch supplies appropriately and allow them to dry before reuse.
This is another opportunity to avoid unnecessary shopping. If containers and supplies are clean, functional, and complete, put them back into your regular lunch-packing area. Add only missing, damaged, or unusable essentials to the same restock list you started earlier.
For lunches containing perishable foods, USDA guidance recommends using at least two cold sources in an insulated lunch bag when refrigeration is not available.
Once the equipment is organized, lunchbox staples to keep on hand can help with the food side of school lunch preparation.
Step 5: Set Up for Busy School Mornings
A useful Back-to-School kitchen reset should improve everyday routines, not simply make shelves look cleaner.
Think about the foods your household reaches for most often on school mornings. Frequently used breakfast foods can stay together and within easy reach. Lunch and snack ingredients can have a consistent area so family members know where to look.
Use the same routine-based zones you established in the pantry rather than adding another organization system. For example:
- Keep frequently used breakfast items together.
- Give commonly used lunch and snack foods a consistent area.
- Make appropriate grab-and-go foods easy to identify.
- Keep dinner basics grouped in a way that makes sense for your household.
The best setup is the one that reflects what your family actually uses. There is no need to copy a standardized pantry arrangement or buy special organizers simply to create functional kitchen zones.
If organizing breakfast ingredients has you thinking about what to serve, continue with 10-minute breakfast ideas.
Step 6: Make Your Back-to-School Restock List
Now return to the restock-as-you-go notes you have been making throughout the kitchen reset.
Review everything you marked as missing, running low, unusable, or appropriate to replace. Before adding an item to the final list, check whether you found another package elsewhere in the pantry, refrigerator, or freezer.
Then organize the remaining grocery needs into categories that make sense for your shopping trip, such as:
- Pantry staples
- Breakfast foods
- Lunch ingredients
- Snacks
- Refrigerated foods
- Dinner basics
Avoid turning this into a universal list of foods every family supposedly needs. A personalized restock list is more useful because it reflects your household’s existing supplies and normal routines.
Once you know what you actually need, you can use that list to prepare for your next Piggly Wiggly Birmingham grocery trip. Depending on the gaps you identified, your list might include categories such as produce, dairy, pantry staples, breakfast foods, lunch ingredients, snacks, or dinner ingredients.
For additional planning, use the Back-to-School shopping checklist. If most of your gaps are shelf-stable foods, school-year pantry essentials is a useful next step. Families moving from kitchen organization into meal planning can also explore five easy school-night dinners.
Your Back-to-School Kitchen Reset at a Glance
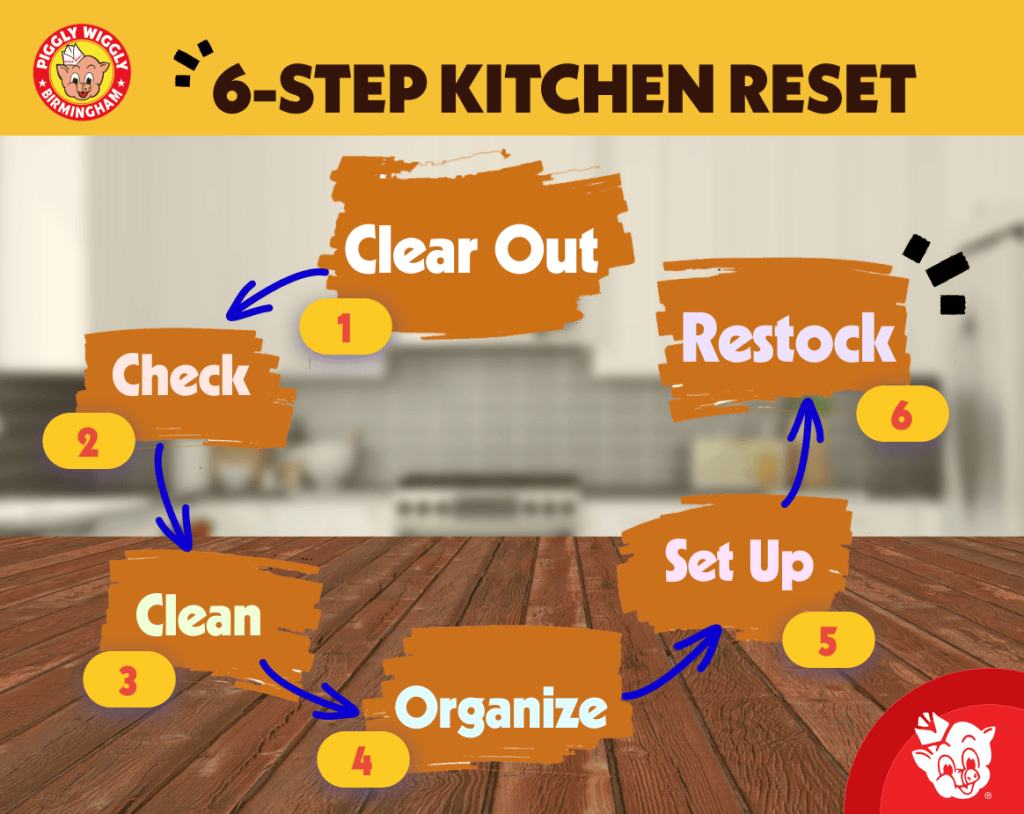
Get your kitchen back-to-school ready with this simple 6-step reset. Clear out, check, clean, organize, set up, and restock your essentials so busy school days start with a clean, organized, and well-stocked kitchen.
Pantry
Review what is already on hand, check package dates and condition appropriately, and sort foods according to what should stay, be used soon, or be replaced or discarded as appropriate. Clean the shelves, group usable foods around your household’s routine, and move older usable items forward where practical.
As you work, keep adding genuine gaps to your restock list.
Refrigerator
Review refrigerator contents and clean spills and surfaces as needed. Organize frequently used foods so they are easier to find without overcrowding the refrigerator.
Keep raw meat, poultry, and seafood securely contained, and verify that the refrigerator is 40°F or below.
Freezer
Take inventory of what is already frozen before adding more. Bring forgotten foods into view, organize existing items so they are easier to identify, and verify that the freezer is 0°F.
Remember that an older date alone does not automatically mean continuously frozen food is unsafe. Use appropriate food-specific guidance when you have questions about storage times or quality.
Lunch and Food-Storage Supplies
Match reusable containers and lids, then check bottles, lunch bags, and cold packs for cleanliness and condition. Clean and dry reusable supplies appropriately and identify only the items that genuinely need replacement.
School-Morning Setup
Keep frequently used breakfast items easy to find and group lunch and snack foods logically. Use simple routine-based areas where they help, and make appropriate grab-and-go foods easy to identify.
The goal is convenience, not a complicated organization system.
Restock
Finish by reviewing the notes you made throughout the reset. Remove anything from the list that you later found elsewhere in the kitchen, prioritize genuine household gaps, and group the remaining items into useful grocery categories.
Your final list should reflect what your household actually needs rather than what a generic Back-to-School list says you should buy.
Frequently Asked Questions
How often should you reset and organize your kitchen?
There is no need to follow a rigid schedule. You can repeat this kitchen reset whenever food-storage areas become difficult to manage, household routines change, or you want to prepare for a busy period such as the beginning of a school year.
Does food need to be thrown away when it passes the date on the package?
Not automatically. Many common food date labels relate to quality rather than serving as universal food-safety expiration dates. Consider the type of label, package condition, storage history, signs of spoilage, and product-specific guidance. Infant formula is an important exception and should not be used after its “Use-By” date. USDA Food Product Dating guidance and FoodSafety.gov FoodKeeper can help with specific questions.
What temperature should a refrigerator and freezer be?
Keep the refrigerator at 40°F or below and the freezer at 0°F. An appliance thermometer can help verify the actual temperature.
Do I need bins and matching containers to organize a pantry?
No. Practical pantry organization is about visibility, useful grouping, and arranging foods around your household’s routine. Original packaging is appropriate, and decorative containers should not be treated as inherently safer or as a way to automatically extend shelf life.
Finish Your Kitchen Reset With a Personalized Shopping List
A useful Back-to-School kitchen reset is about function, not perfection. By checking what you already have, organizing food and supplies around your family’s routines, and keeping a restock-as-you-go list, you can finish with a shopping plan based on genuine household needs.